The faucet is one of the most used plumbing fixtures in the kitchen; it is used for many tasks throughout the day, so over time, the faucet begins to show signs of wear like leaks, difficulty operating the valve, or even cracks. If nothing is done about this, you can put your entire kitchen at risk of water damage if the faucet eventually bursts, so when you notice that your kitchen faucet is worn out or damaged, it is best to change it.
Fortunately, changing a faucet is what most homeowners can do by themselves as the process is pretty easy to learn and doesn’t require much expertise, so keep reading to learn how to replace a kitchen faucet so you can do it yourself whenever you want and save money for hiring plumbers.
What Tools Will You Need?
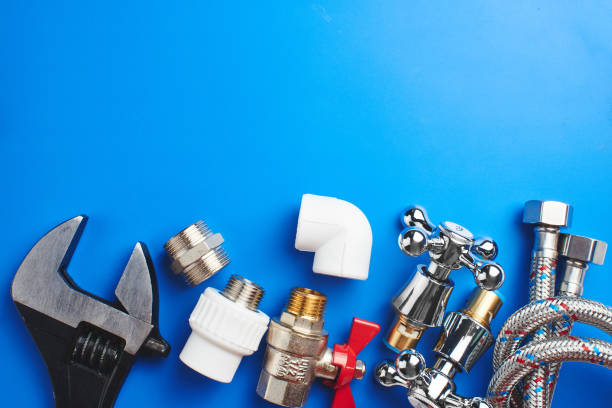
When learning how to replace a kitchen faucet, you must first learn about the tools and items you will need, which include the following.

- Screwdriver.
- Teflon tape.
- Putty knife.
- Wrench.
- New faucet.
- Pliers.
- Bucket.
- Tape measure.
- Towel
How to Replace a Kitchen Faucet
This is the first stage of how to replace a kitchen faucet; you should follow these steps to prepare your kitchen sink and remove the old faucet.
1. Turn Off the Water Supply
The first thing to do is to turn off the water supply to the kitchen sink. There should be two valves connected to the hot and cold water lines; shut off the valves. If the valves haven’t been turned off for a while, they may start leaking, and if this happens, you may need to buy new ones.
Moving forward, you need to open the faucet to drain any water that is left there and keep it open to prevent a build-up of pressure in the valves.
See also: DNA Test Price
2. Disconnect Water Lines
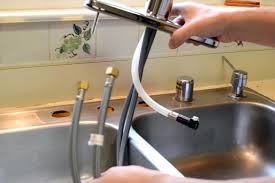
Use a plier to loosen the nuts on the hot and cold water lines until you can start turning them with your hands. Then, detach the hose one at a time and make sure you have a bucket in hand to drain any excess water.
3. Remove Old Faucet
Use a basin wrench to disconnect the nut underneath the faucet, remove the nuts from the waterlines and the faucet and then pull the faucet out of the hole in your sink. Now, take the liberty to clean every dirt and junk accumulated beneath the old faucet.

4. Install the New Faucet
When learning how to replace a kitchen faucet, after successfully removing your old kitchen faucet, you can now progress to learn how to fix a new one in these simple steps discussed below.
5. Prepare the New Faucet for Installation
You first need to choose a new faucet that matches the pattern of your old faucet, then wrap three layers of Teflon tape around the threading of the supply tubes of the new faucet. Without applying too much force, use an adjustable wrench to screw the supply tubes into the faucet fixture. Also, remember that there are so many different types of faucets, so follow the manufacturer’s instructions to assemble them correctly.
6. Cover Any Additional Holes in Your Sink
If your sink has multiple holes to accommodate different types of faucets, choose the holes you are using for this new one and then set trim rings or a deck plate over the top of the holes you are not using. Ensure you align the deck plate properly before securing it underneath your sink with the nuts provided in the packaging; you can use a wrench to tighten the nuts.
Remember that faucets with two handles usually have a three-hole setup, while those with one handle require one hole.
See also: Blood Tonics for Weight Gain
7. Secure the Faucet
Now, align the faucet in the holes that you left uncovered. Feed the tubes through the centre hole one at a time. When the tubes are in, place the faucet onto the sink and hold it in the position where you want to secure it.
Now, you need someone to help you hold the faucet from above the sink so it does move from its position. Then screw the nut with your finger first to the base of the faucet, then tighten it with a wrench.

8. Attach the Water Lines to the Faucet Supply Hoses
Connect the supply hose for cold water to the cold water line and the one for hot water to the hot water line, then tighten their nuts with a plier. Then, if you disconnected the garbage disposal before, you can plug it back in. In addition, if your new kitchen faucet has a sprayer, connect it to the base of the faucet and tighten it with a plier.
Finally, you now have a new faucet in your kitchen sink. If you have been meaning to learn how to replace a kitchen faucet, you can see that it is very simple; you just need to follow the right steps. So, if you have issues with your kitchen faucet, this is the right time to change it so you can avoid leaks in your kitchen. However, ensure you follow this guide correctly, and if you still feel like you can’t handle the task, you should get a professional plumber to do it for you.


